
Some of our patients have come to us with questions regarding the technology they use. These are common technology devices like their phones, computers, and televisions. We wanted to help our low vision patients with a deep look at how technology can be modified, for the most part with built-in features, to enable them to see what they want, the way that they want.
This is the first in a series of blog articles and videos we’ll post on how to get the most from your devices so you can maximize what you see with the vision you have.
Vision Accessibility Features of the MacOS
In this entry, we’ll focus on the vision accessibility features of the Mac Operating System. If your laptop or computer is updated frequently, with the latest versions of the MacOS, you’ll likely have the features we’ll discuss here.
We’ll show you the 5 current features offered as part of the operating system. To get to them, on your Mac, choose the Apple menu (top left of your screen), then System Preferences, then click Accessibility. If your device is using its default settings, it may be difficult to read and you’ll need the assistance of someone to get you started.
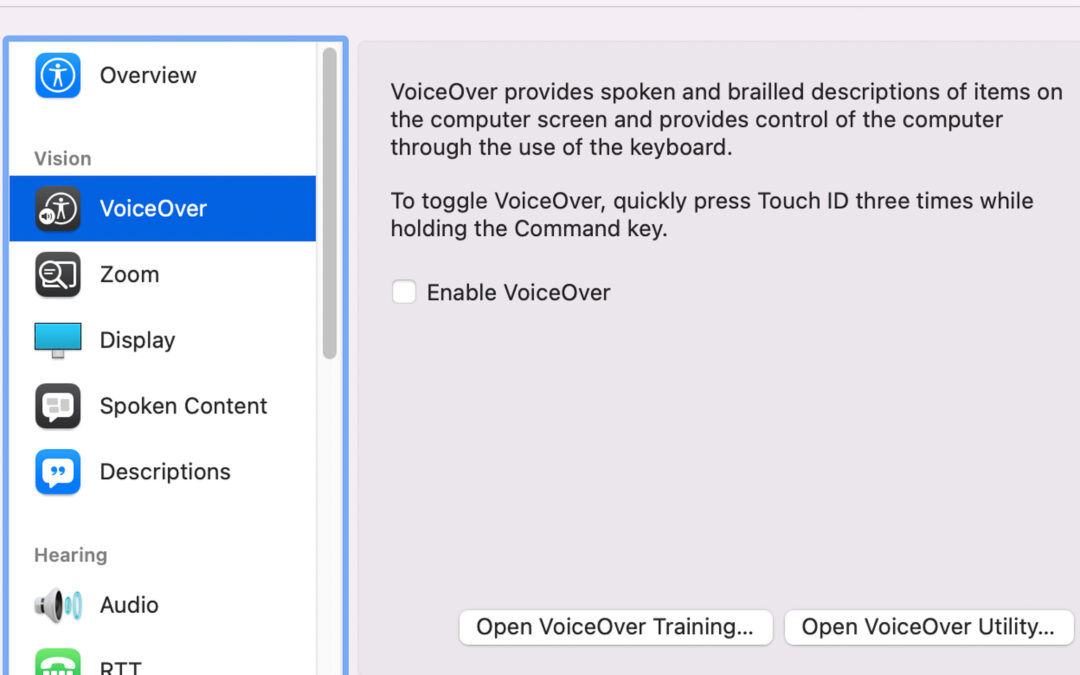
VoiceOver
VoiceOver is the built-in screen reader on your Mac. It will say what’s on the screen, including text that’s in documents, web pages and windows beloging to applications. Click here for more details on how to use this feature.
Zoom
As Apple puts it, you can enlarge your screen to your liking with the Zoom accessibility feature of the Mac. Zoom is a magnifier that lets you enlarge content on your screen. You can choose full-screen magnification or picture-in-picture. In the latter mode, your magnified area will appear in a separate window. You can also choose split screen in the latest version of the Mac OS.
As you are using your computer, you can turn on the zoom capability to magnify areas that you need help with. Below is a video we’ve linked with a great explanation of how the zoom feature works.
Display
With this accessibility feature, Apple aims to let you control how your display works. You can invert colors in order to quickly see text in a different contrast and set of colors. There’s motion reduction in the case where motion on the screen may be hard to track or may cause other reactions.
You can also increase or reduce the size of your icons on the menu bar. This is particularly useful if you have many icons that may be hard to read. In line with this and as an added way to quickly get to the applications you care about, reduce the number of icons on your menu bar to just those that you frequently use.
Here’s another video, a bit old, but still very useful, on the Display accessibility feature of the Mac.
Spoken Content
Apple calls this going from the written to the spoken word. With this accessibility feature, you can hear the content of the entire screen read aloud to you. You can select a range of text and this will be read back to you when you hit the key combination that triggers it. These key combinations can be adjusted as well.
You can also set it up so you can hear your words as you type them. This can be fine-tuned to read back to you words or characters as you type them.
This is a video explaining the Spoken Content feature of the Mac.
Descriptions
Finally, we have descriptions, which allows your Mac to read to you detailed descriptions encoded in movies as you watch them. This is particularly useful to contextualize yourself in the movie as it plays. This is not available in all movies, so make sure to find the “AD”, or audio description icon, under the movie title.